OneTint Installation - US
- 16 Dec 2025
- 1 Minute to read
- Print
- DarkLight
- PDF
OneTint Installation - US
- Updated on 16 Dec 2025
- 1 Minute to read
- Print
- DarkLight
- PDF
Article summary
Did you find this summary helpful?
Thank you for your feedback!
OneTint Installation / Full Install Only - Downloaded Setup Files
These following steps are for intended for installation files that are downloaded.
Do not follow these steps if you have a USB drive that was sent.
Installation Steps
A tech will send a link through email, clicking the link in the email will open up a web browser to download the setup file.
The file names may be different in the screen shots, but the steps are still the same.
After clicking the link, an agreement page will appear, you must click
ACCEPTto continue.png "image(8).png")
Once the agreement is accepted, click on
DOWNLOADon the right side..png")
Depending on which browser you are using, if you click the
Down Arrowbutton, you can monitor the download..png")
ATTENTION: Some web browsers may block the file download until you select to keep the file. If you’re having issues, look at the examples below. This is an example using Microsoft Edge, all browsers will behave differently.
Select
See more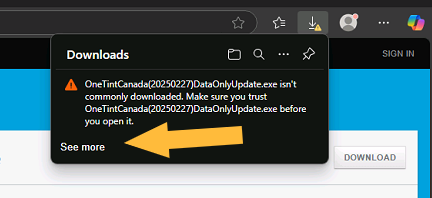
Hover the mouse pointer over the file and select the
…button
Select
Keep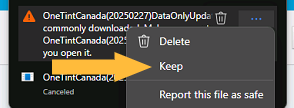
Select
Show more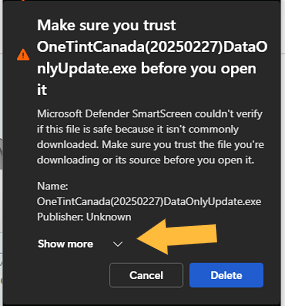
Select
Keep anyway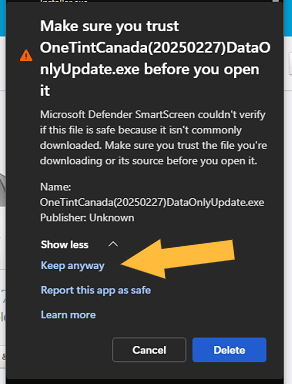
Once the download is finished, click the
Folder Iconthis will open the location of where the file is saved..png")
Find the file downloaded (yours may be different than what is shown here) right click and select
Run as administrator..png")
A security window may pop up with the information below. Click on
More Info..png")
A secondary window will pop up select
Run Anyway..png "image(14).png")
Lastly a user account control window will pop up, select
YES..png "image(15).png")
OneTint will now extract the files, wait a couple minutes until it is finished. Once finished a
Menuwill pop up..png "image(16).png")
This guide is for doing a Full Installation, so select the
FULL INSTALLoption, the date indicates the date when the package was made..png "image(17).png")
Once
FULL INSTALLis selected, a series of windows will pop up for example this is one of them, nothing is needed to be pressed on this window, its more for informational purposes..png "image(18).png")
This window checks for the framework needed and exits automatically if the requirements are met. If requirements are not met, it may be necessary to select
Update..png "image(19).png")
This window confirms that you do want to continue with installation, select
Yesto continue..png "image(20).png")
A command prompt window will appear and scroll automatically, this shows that OneTint is actively working on installation, once finished it will close automatically.
.png "image(132).png")
Once the command prompt closes the menu will appear again, this time select
Exit..png "image(133).png")
Click
YESto confirm..png "image(21).png")
If successful, two OneTint icons are automatically placed on the desktop.
.png "image(22).png")
The installation is now finished.