Matchrite / X-Rite i1 Paint
- 08 Jul 2025
- 2 Minutes to read
- Print
- DarkLight
- PDF
Matchrite / X-Rite i1 Paint
- Updated on 08 Jul 2025
- 2 Minutes to read
- Print
- DarkLight
- PDF
Article summary
Did you find this summary helpful?
Thank you for your feedback!
i1 PAINT INSTALLATION AND ONETINT CONFIGURATION
These steps are for new installations but also can be used to troubleshoot a missing
Spectro buttonor for communications error.
SECTION 1: INSTALLING i1 PAINT DRIVERS
Plug in the
i1 Paint deviceinto aUSB port.Locate an icon on the
DesktoplabeledOneTint DotNet Setup. (If the icon is not present on the desktop, see step 3a.)Right Clickon the icon and selectRun as administrator. This must be done, or errors will occur during driver installation.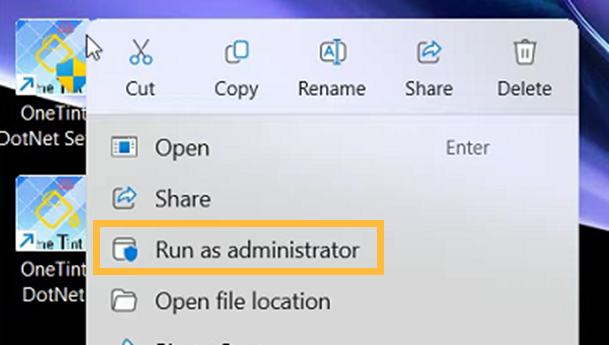
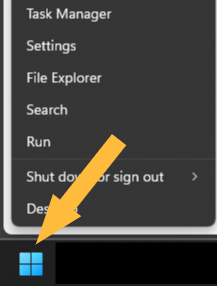
Follow these instructions only if the
OneTint DotNet Setupicon is missing on the desktop, otherwise go to step 4:Right Click on the Windows Start button.
Select
File Explorer, depending on your version ofWindowsit may be in a higher or lower position.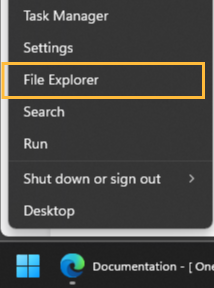
Single Left ClickonThis PC, on the right side,Double Left ClickonLocal Disk (C:).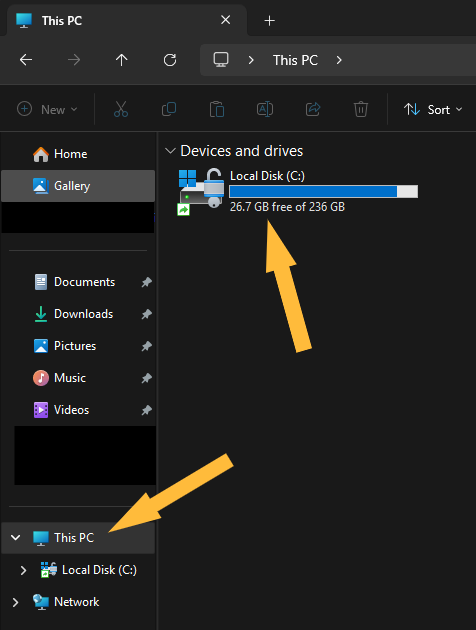
Locate the folder labeled
OneTintandDouble Left Clickon it.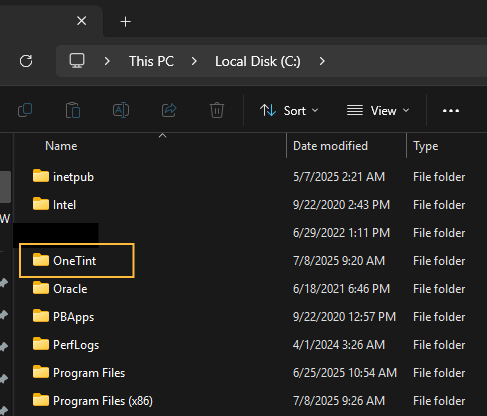
Double Left Clickon the folder labeledOneTintDotNet.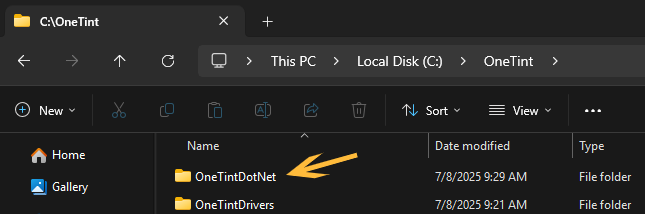
Scroll down the list and
Right Clickand selectRun as administrator(this is important, failure to do so will result in errors) on the application labeledOneTintSetupor you may seeOneTintSetup.exedepending on your computer configuration, just make sure it is noted as anApplicationon the right side.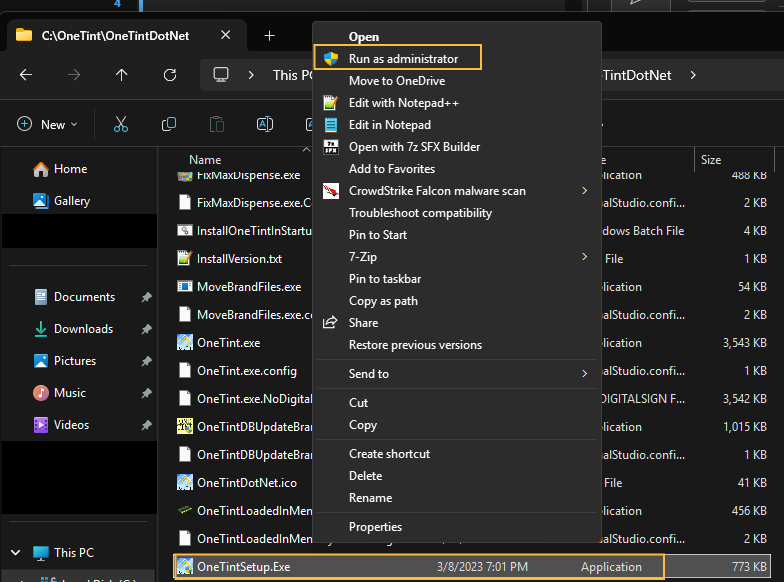
Proceed to step 4.
A
User Account Controlwindow may pop up. SelectYes. If not, skip this step.In the
OneTint Setupmenu, selectInstall Drivers.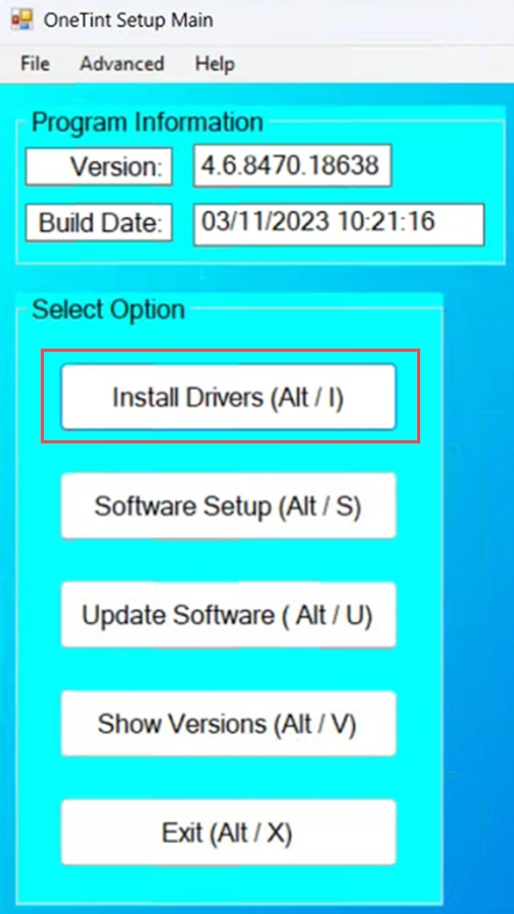
In the
Install Driversmenu,Double ClickonSpectrophotometers, thenDouble ClickonMatch-Rite Drivers, then selecti1PaintbySingle Clickingon it. The selection will now be highlighted in blue.ClickInstall Driversto proceed with installation.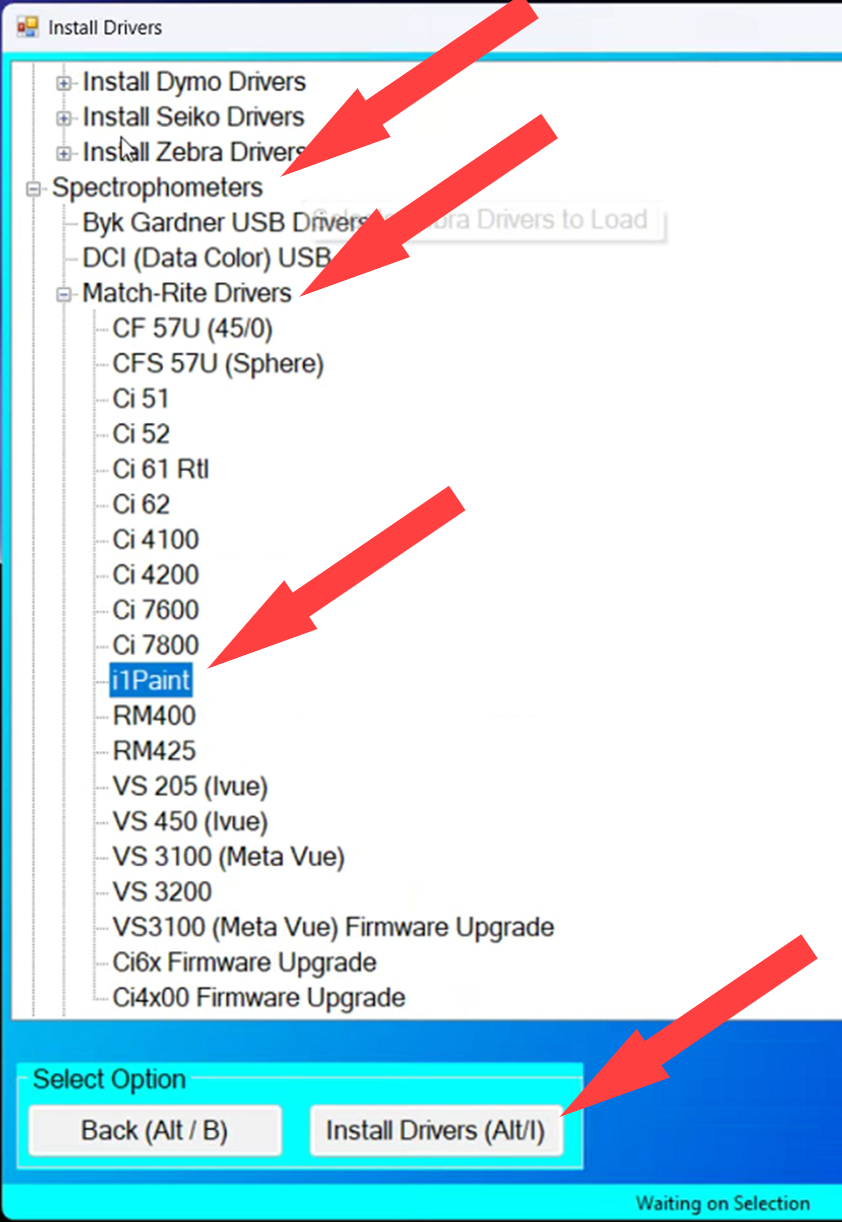
Select
I accept the agreementthen selectNext.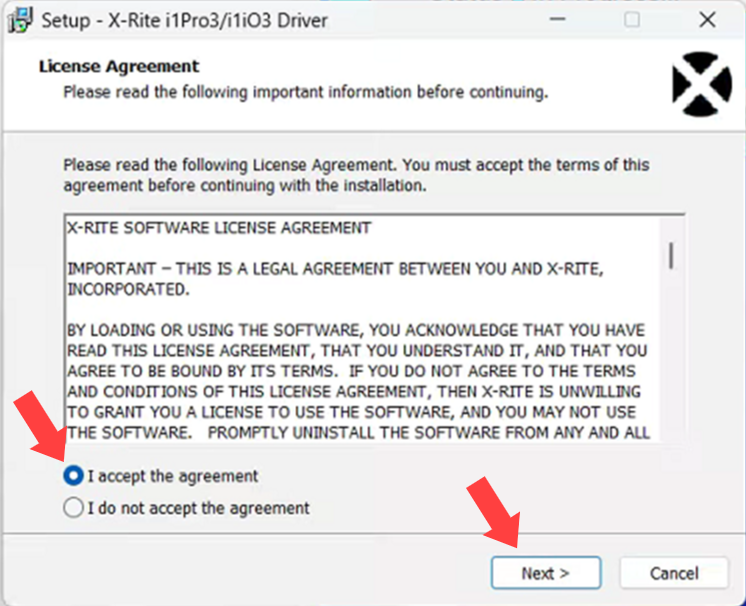
On the
Windows Securitywindow, make sureAlways trust software from “X-Rite Incorporated”is checked, then selectInstall.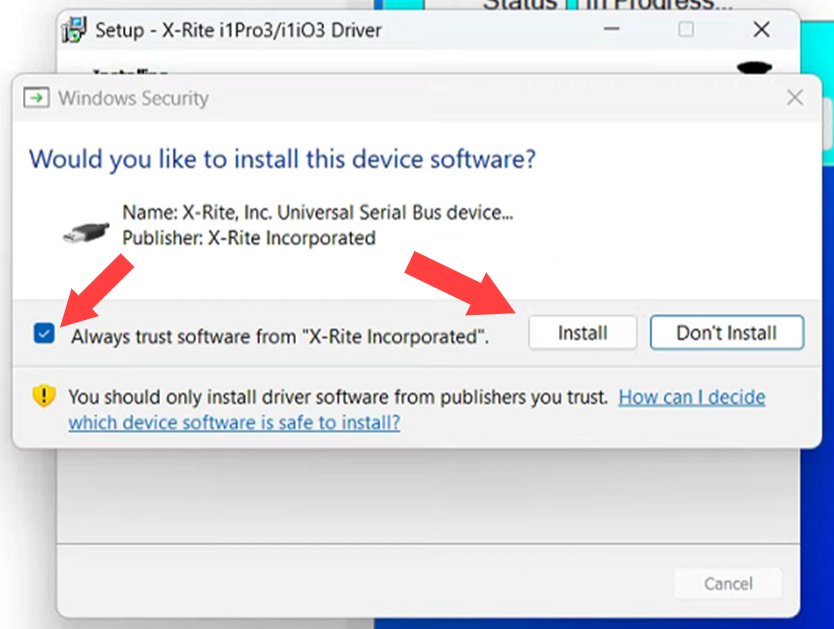
Click
Finishto exit theDriver Setup Wizard.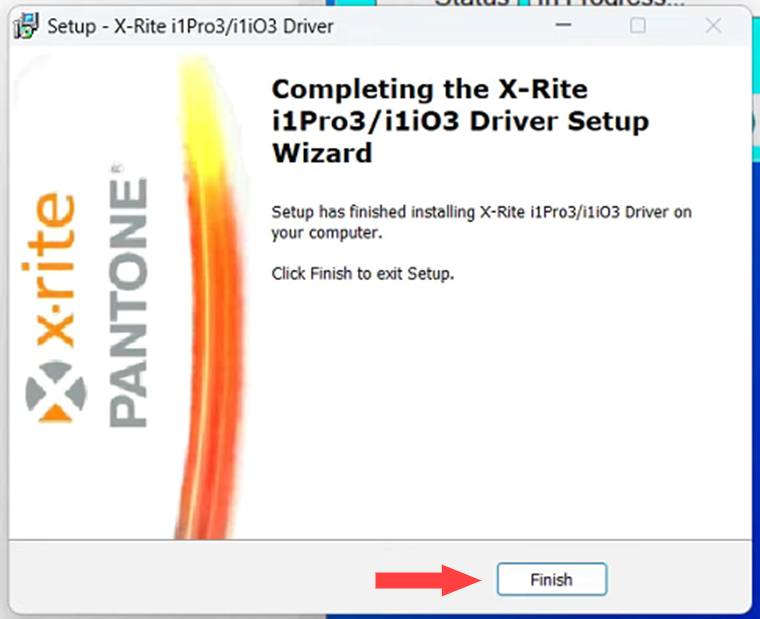
Verify the device drive installation is installed successfully; to do this put the mouse cursor over the
Windows Start Button,Right Clickand selectDevice Manager.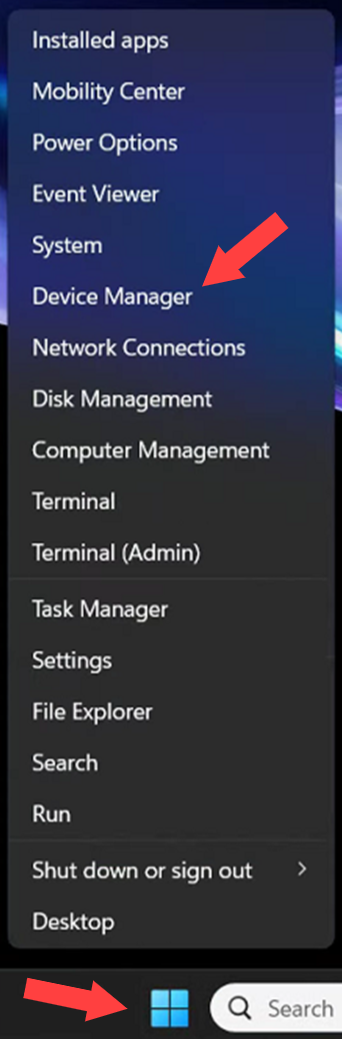
In the
Device Manager, look for theUniversal Serial Bus devicessection,Double Clickon it to expand the section, below thei1Pro3will be listed.If the i1Pro3 device is missing, Unplug the device and plug it into a different USB port. If that does not solve the problem, reinstall the driver again.
If further troubleshooting assistance is needed, please contact X-Rite Technical Support at 1 (888) 800-9580.

SECTION 1: INSTALLING i1 PAINT DRIVERSis now completed. Proceed to the next section,SECTION 2: CONFIGURING ONETINT.
SECTION 2: CONFIGURING ONETINT
Open the OneTint application.
On the
Main Menu, selectSETUP.For
User Name, selectAccount X Rep.For
Password, type inconsumerthen selectOK.In the
Setup & Utilitiesmenu, selectSpectro.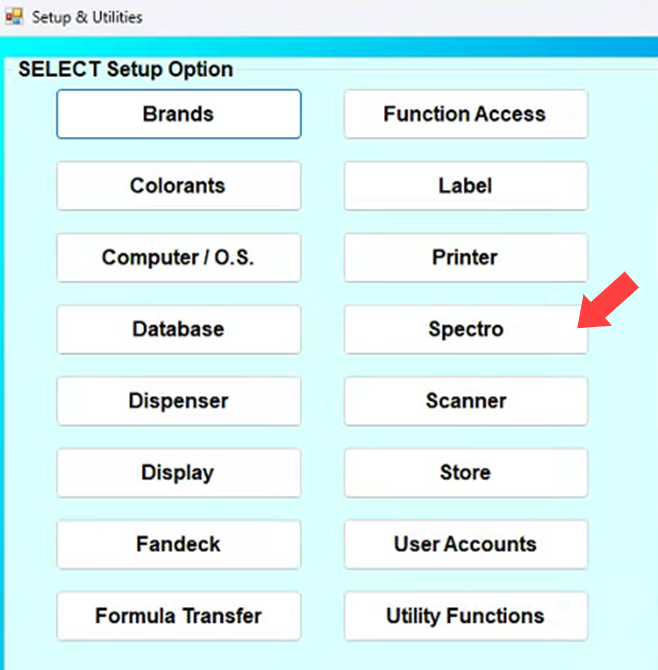
In the
Spectro Optionsmenu, selectSpectro Configuration.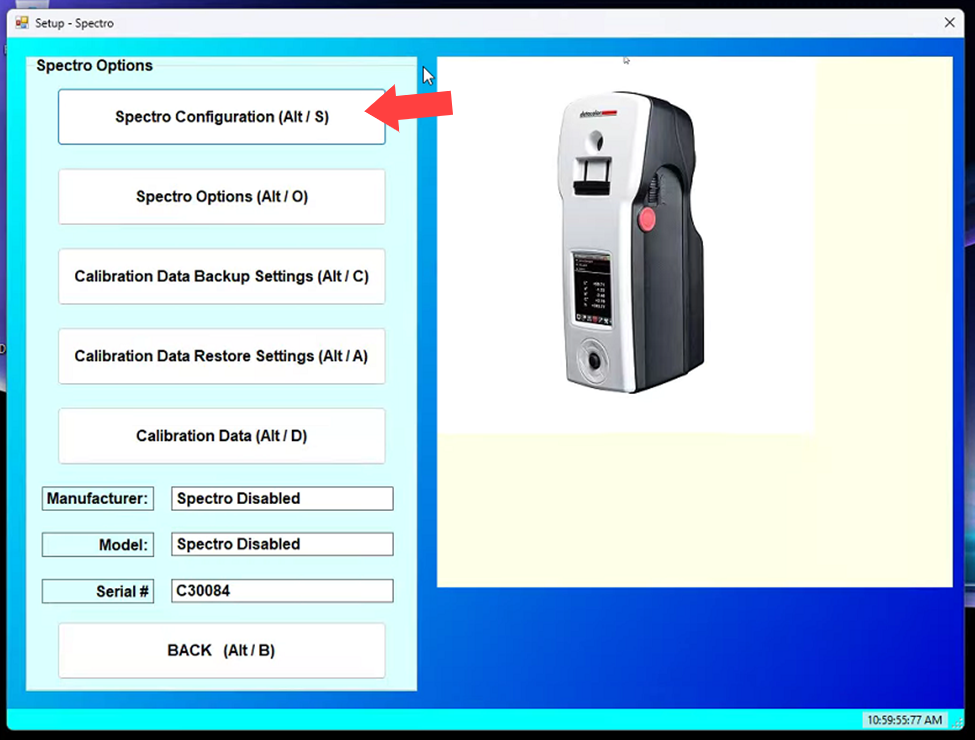
In the
Setup - Spectro Configurationmenu:For
ManufacturerselectMatchRiteFor
ModelselectI1PaintCheckthe box forSpectro ActiveMatch the settings to the screenshot below, once done select
BACK, then keep selectingBACKuntil theMain Menu.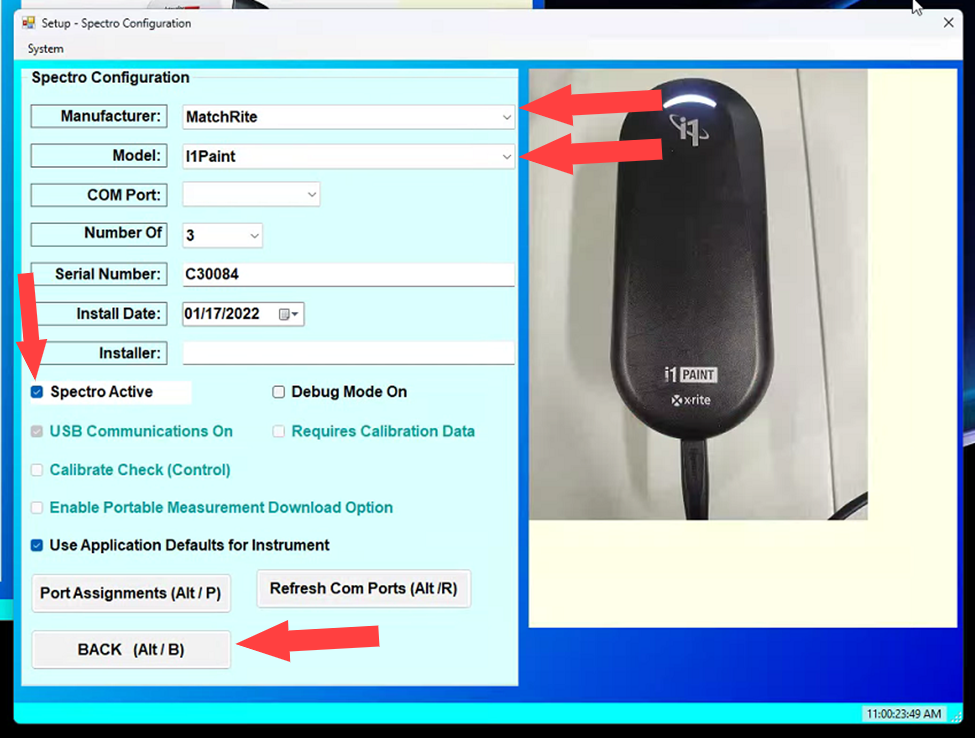
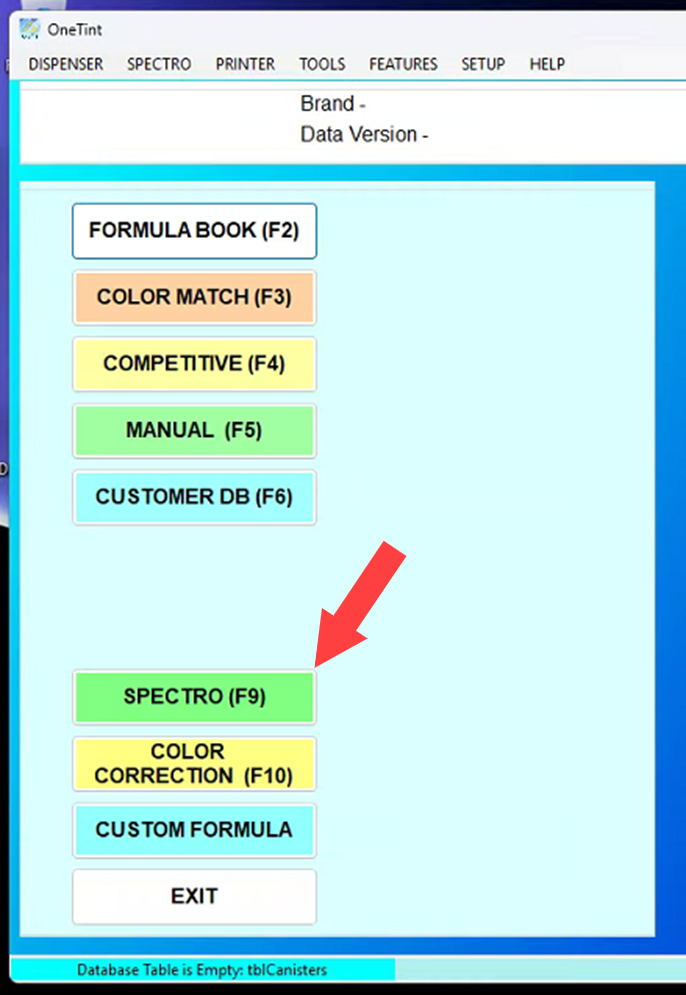
A SPECTRO button option is now active on the Main Menu. Select the SPECTRO button.
In the
Spectro Maintenancemenu, selectStart Spectroto start communication with the i1Paint device.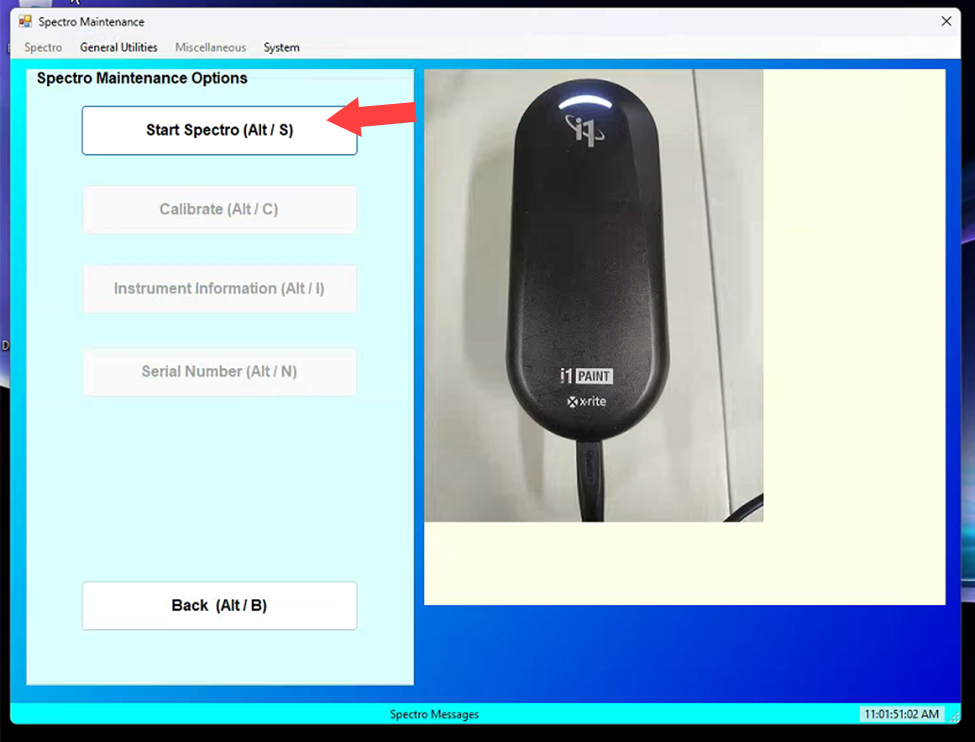
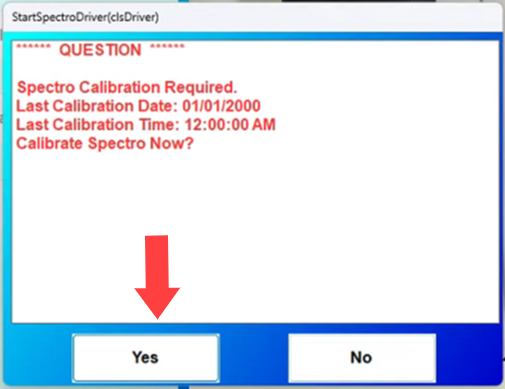
Once communication is established, the Spectro Calibration Required menu will appear. Select Yes then run though the on-screen instructions to calibrate the i1Paint device.
Once
Calibrationis complete, selectBackto return to theMain Menu.SECTION 2: CONFIGURING ONETINT is now complete.