Dymo 450 Driver Installation & OneTint Configuration
- 21 Jul 2025
- 2 Minutes to read
- Print
- DarkLight
- PDF
Dymo 450 Driver Installation & OneTint Configuration
- Updated on 21 Jul 2025
- 2 Minutes to read
- Print
- DarkLight
- PDF
Article summary
Did you find this summary helpful?
Thank you for your feedback!
Dymo 450 Installation
This guide contains two sections, the Dymo Driver Installation and OneTint Configuration, both sections need to be completed for proper operation.
Section 1a: Dymo Driver Installation
On the
Desktop, locate icon labeledOneTint DotNet Setup, right click on the icon and clickRun as Administrator. If the icon is missing from theDesktopskip the steps below and followSECTION 1B: DYMO DRIVER INSTALLATION - MISSING ICON..png")
A window may appear asking to “allow this app from an unknown publisher to make changes” select
Yes
A
OneTint Setup Mainmenu will appear with options, selectInstall Drivers..png")
On the
Install Driversmenu, locateLabel Printers, double click onInstall Dymo Driversto reveal the submenu. SelectDymo Connect Versionthen selectInstall Drivers..png")
A
DYMO Connect - InstallShield Wizardprompt will appear, selectOK. Follow the prompts to install Dymo Connect, leave any settings on default if prompted, a reboot may be necessary to complete the driver installation. Once finished, theDymo Connect - InstallShield Wizardwill close.Exit the
Install Driversmenu by clicking theXon the top right of the menu. SelectYeson the prompt..png")
Exit the
OneTint Setup Mainmenu by selectingExit.Continue to
SECTION 2: ONETINT CONFIGURATION
SECTION 1B: DYMO DRIVER INSTALLATION - MISSING ICON
Open
File Explorerby clicking on theStart Menuicon then typingFile Explorerthen selectFile Explorericon..png")
Navigate to the
Dymo Driverfolder bycopyingthe line below by selectingcopyto the right.C:\OneTint\OneTintDrivers\Printers\Dymo\Dymo Connect 1.4.3.131In
File Explorerclick on the address bar,right clickthen selectpastethen hit theEnteron the keyboard.
Locate the file named
DCDSetup1.4.3.131orDCDSetup1.4.3.131.exe, these are the same file. Some computers may display the file with or without the.exe.Right clicktheDCDSetup1.4.3.131file, selectRun As Administrator.A
DYMO Connect - InstallShield Wizardprompt will appear, selectOK. Follow the prompts to install Dymo Connect, leave any settings on default if prompted, a reboot may be necessary to complete the driver installation. Once finished, theDymo Connect - InstallShield Wizardwill close.Once closed, the driver installation is finished.
Continue to
SECTION 2: ONETINT CONFIGURATION
SECTION 2: ONETINT CONFIGURATION
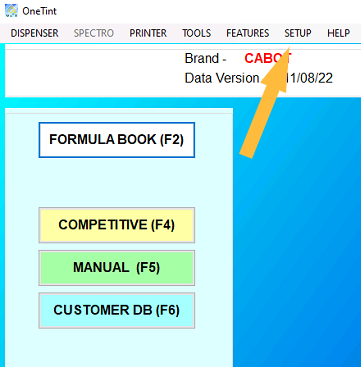
On the
Desktop,double-clicktheOneTint DotNeticon to start the OneTint program.On the Main Menu of OneTint, select SETUP at the top.
Click on
Account x Repand selectService x Technician. For the password enterColorresthen clickOK..png "image(53).png")
Select
Store.png")
Replace
Your Store Namewith your store. Replace the0000with your store number or leave blank. Then clickBACK..png "image(54).png")
Click
Printer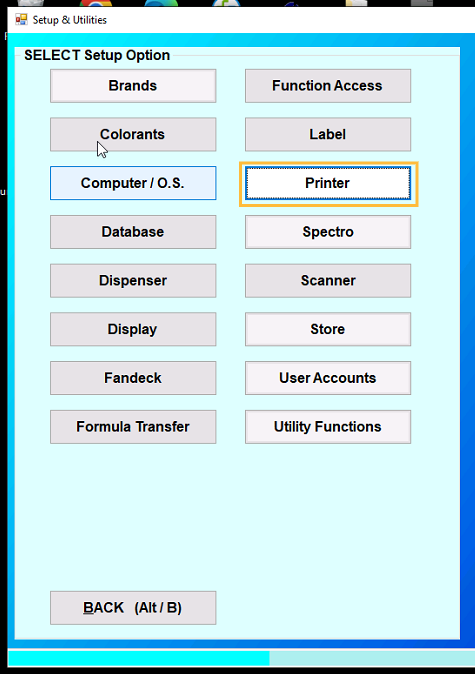
Select
Label Printer.png")
In the
Manufacturerfield, make sureDymois selected, if not click on thedown arrowand selectDymo. Next, clickBarcode Setup.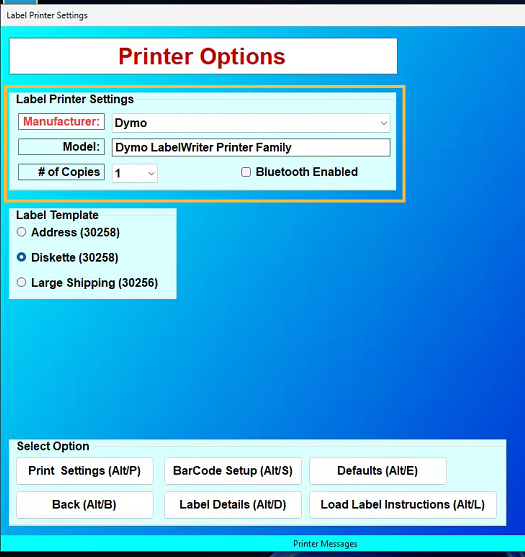
Make sure the
Print Bar Codebox is Unchecked. ClickBack.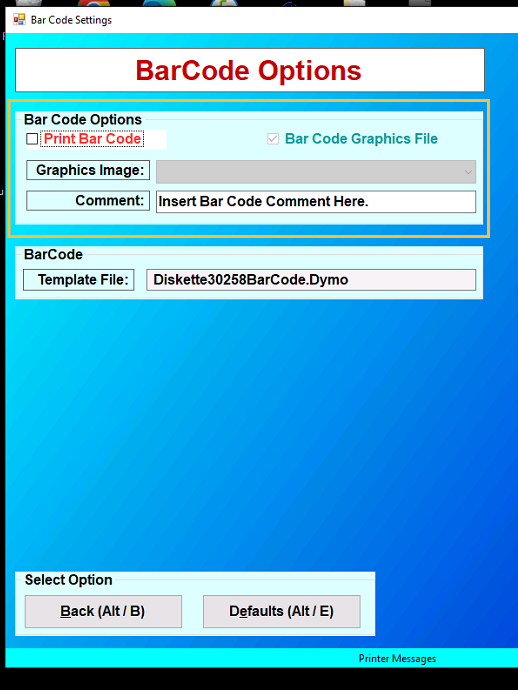
Click
BACK.png)
Click
Printer Utilities..png")
Make sure
Active Printershows theDYMO LabelWriter 450is selected, if not click the down arrow to select the correct printer. ClickBACK..png")
Setup is complete, keep clicking
BACKuntil you return to theMain Menu.